Showing posts with label mending. Show all posts

Tuesday, 13 May 2014

Sugru and other squidgy mendy stuffs

I have been quite busy recently with a home made version of Sugru.
While i love the idea of Sugru and think that the inventor is a clever old clog, I cannot warrant spending £8 or £12 on a few tiny little blobs of it when I can make whole blocks of it If I want just by going to instructables or Youtube and typing oogoo into the search box.

Anyway.

Oogoo or Sugru is a silicone based putty  which sets in the air and becomes flexible and rubbery.

It can be used to mend many things and is quite strong and waterproof.
Stands heat and cold well and can be made to be almost any colour.

The official version Sugru  is available in lots of places and comes packed in foil with a 6 months life span or 18 months if you keep it in the fridge.


  • I have used my homemade version to mend a dustpan.
  • Make it a new squeegee edge.
  • Make hooks for the kitchen
  • Pan lid holders
  • A knob for a saucepan lid.
  • A handle for my deep fat fryer
  • hooks in the bathroom
  • Some washers
  • A holder for my wifi dongle so it sits on top of the monitor
  • Buffers on the top of our old loft ladder so it doesn't scratch the wall paper.
  • A Grip for the flask lid which gets too tight to undo
  • Mended the  end of knob on cup rack
  • A new cover for a penknife which I found trodden into the mud when we were out.


Future plans are


  • More bathroom hooks
  • More kitchen hooks
  • More pan lid holders
  • Tidier way to fix the laptop connector on two of the fixed laptops
  • Some rubber stamps for craft
  • Fix my yarn winder to be more robust
  • Fix the seal on the double glazed sliding door that leaks


I'm sure I will find other uses .
So far that is 13 things mended and 7 planned.
I don't know how many packets I could get through of the commercial version.

If you are interested in using the sold stuff.
Consider looking around the house first and finding all the things you want to mend with it.
Write a list and what colour you would need.
This stuff comes in black,white ,yellow,blue and red which are all the primary colours meaning you can mix almost any colour with them.

The home made version is slightly more versatile because you can of course make any colour you have in paint , including I think gold,silver and fluorescent and with glow in the dark powder, there is that option also.


Friday, 21 March 2014

Altering a Bra and other articles of clobber

Altering clothes for the frugally challenged.


I have been busy recently with my sewing machine.

I took in three pairs of shorts that I made about 8 years ago and were a good 4 inches too wide for me having lost weight and got fitter.

They are 100 cotton and dark blue with tailored waist band,inseam pockets and patch pockets.
That meant that I had to completely rip out the side seams after removing the patch pockets and rework them with new seams and seam pockets.
I decided not to remove the whole waist band but instead cut into it at the side seam as it was going to be so much narrower overall and incorporated it into the side seam as I machined.

One pair was shortened by about 3 inches, one pair by 2 inches and one pair by an inch.
The longest pair are going to have belt loops added so that each pair is slightly different.
I reattached one patch pocket on each pair but kept the second for using as material for the belt loops.

It took a good while but thankfully I have a very nice sewing machine so it was fun too.


Then I mended 6 pairs of pants( underwear) where the elastic had parted company with the material due to very cheap manufacture.
These last were done by hand because the material is thin and soft and the elastic although sound, is narrow and obviously stretchy.

I also had 4 quite nice bras that I bought back when I thought I was a 36 B
Unfortunately I am not a 36B and probably never was (MUM!).
The big TJ Hughes in town closed and their sale had several 34C bras which I bought to see how they fitted.
They were exactly right for me so I resolved to alter my other bras to fit better too.

I cant do much about the cup size but the chest size is doable.
Here is a diagram of how to do it incase anyone fancies having a go on their own.
 This was 
a really easy project and saved my bras from the dustbin. 
I remember when I first got a bra,Mum was in no rush to spend money on clothes and so it was after much pleading that I was given one, it was mums cast off and was way past its best.
If I had realised how easy it was to adjust the girth size back then ,I probably would have snaffled a needle and thread and got to work to make my ghastly acquisition a bit more acceptable .
As I did not, I went to school wearing it and other similar cast off s with over stretched straps and material and suffered the mirth of the 12 to 16 aged girls during many a PE lesson.


Bleaching T shirts

I found an interesting article on instructibles by a member called stinkymum.

She describes using Bleach in a tie dye fashion to alter dark T shirts.

This was very interesting to me because one of my favourite T shirts is black with a cheetah on and has become faded under the arms which looked horrible.
I also have a T shirt that OH gave me . It had been thrown away still in its packet because it was a small and didn't fit any of the beefy coppers.
When I wore it the first time, the black came off on everything.

So anyway I read through her instructions for various folds and chose two I liked the look of in her pictures.

The bleach went into a large bowl. I did 1 large yog container of bleach and 5 of water as it was wilkos thick bleach.
Then after folding and rubber banding my shirts ,I put them in and went off to do something else.
20 minutes later I took them out ,unbanded and rinsed them.
They had started to change but not very much so I had to carefully fold them back as closely as possible to previously and put them back again.
I gave them another 20 minutes because she had quoted 1 part bleach and 3 water and I had diluted mine by a lot more.

The second attempt was much better.
I rinsed like mad then when the rinse water  seemed to have cleared of browny colour, I put them through the rinse on the washing machine.

The manky underarm is gone from my cheetah shirt and the other shirt looks very cool going from a light mushroom brown to its original black in an interesting fadey pattern a bit like stained glass.
The cheetah is silk screened and so has not been affected at all and now sits in a shadowy shady mottled background. The underarm staining which was really I suppose natural bleaching from sweat and age, is just part of the bleach pattern instead of standing out screaming old and manky.


Friday, 12 April 2013

Unglueing a violin bridge

So you have glued your violin bridge to your violin only to discover that they are not supposed to be glued.
Do not despair!
All is not lost.

First of all,can you discover what the glue is?
If you can and it is a water soluble glue, try wetting the feet of the bridge with a paint brush to soften the glue.
If it is superglue, you may be able to soften the glue with something made to dissolve super glue.

In my case, I had no idea what the glue was as we did not glue it ...................

DD bought a Violin from a friend, he was only asking £10, so having learned to play when she was younger, she jumped at the chance of having her own.

When we were helping her move last week, she indicated that she didn't want the Violin because the pegs kept undoing.
Instead of throwing it away as she requested, we brought it home.

Looking at the instrument it was plain it had seen better days.
The fret part(no idea of the correct term)  was painted at intervals with either white nail varnish or white-out ( tippex), to indicate finger positions.
The pegs were thick with resin and some sort of glue.
The bridge was glued on and there was a big drip of glue that had run as well, beside it.

Plan of action

1.Find stuff that dissolves glue of various kinds and try in a little place where it isn't drastic in case it melts the varnish.

I tried
  • Water
  • white spirit
  • Acetone
  • Penetrating oil (like WD40)


I used a paint brush to apply and kitchen paper towel to remove.

  • The white spirit did nothing either bad or good
  • The Acetone removed the White marks on the fret board without melting or spoiling it.
  • The penetrating oil did make the glue look more pronounced but nothing more.

 2. Find a thin sharp object to get under the bridge and ease it a bit.

I used a razor blade.
It was one of those flat conventional blades which luckily the men have gone back to using so we had some handy.
A stanley blade might have worked but is thicker so may not have.

The blade was snapped in half length ways so I didnt cut myself too much and I very slowly and carefully worked it back and forth under each bridge foot in a sawing motion.


Success!

The bridge came away.
It left a little of itself behind and in one or two places it took a bit of varnish with it.
There was a lot of glue left behind.

3. Remove as much of the excess wood as possible.

This was all done using the blade.
It took a good long while but caution was needed.

4. Remove excess glue.

The penetrating oil worked best.
It didn't soften the glue at all but it lifted the edge slightly and the blade was very lightly rubbed over it ,which got rid of a goodly amount of glue in little shards (it looked like super glue at this point but as the acetate hadn't touched it,  I don't think it was.


5. cover up the evidence.

The cleaned violin had a few bits of bare wood showing so I used a floor touch up pen that we bought in a set from poundland for doing scratch repairs on laminate floors.


The palest pen was chosen and I carefully dotted the colour on ,waiting and redoing as each bit dried.


On the fret board there was a scratch which was covered up with a Black Sharpie pen (thin black marker).
It actually looks better in the flesh as the darkness outside of each speckled area is not really quite as dark as it looks in the photo.
The new bridge will sit here and cover much of it .

**********************************************************************************

It still needs a new bridge as the old one was shaved off and the feet are not really very well shaped anymore. Also it has a gory blood finger print courtesy of me.


We need to clean the holes where the pegs go in.
I have cleaned them a bit but two holes feel like they have been gunked with glue and will need a bit more work to clear.
I cleaned the pegs in hot water and they are fine once the old gunk is gone.
We might be able to roughen the pegs a little to help them to stay put.


DH will most likely restring it as he is the strings man (he plays Mandolin and Guitar).


Tuesday, 9 April 2013

Back from the north

Well we did it!
The flat is sorted.
It took all the 10 days of constant work to get it ship shape but it is done.

Day 1

When we got there after a 12 hour journey by car (we take turns to drive but still had about 3 hours of sleep stops as there was no rush), the flat was in disarray. There were bags and boxes and 'stuff' everywhere. We sat around for a long while waiting for DD and her BF to get their stuff sorted. They were in no great hurry. In the evening , their guy appeared and about 2 3rds of the pile was removed. We had a take away pizza delivered while we waited for him to come and DH drove one car full of mostly DD's belongings over to her new flat. Then there was a flurry of activity as DH and I began going through the remaining bits to bin as much detritus as possible. We found a backpack full of bits belonging to DS who had lived there for 3 years before DD, including a 3 piece suit and a new pair of shoes.

Day 2

Thank goodness we had bought a steam cleaner.
The Fridge and Freezer were both so frozen that they were ridiculous.
In fact the freezer was frozen with the door open so it was a constant battle between the heating and the freezer.
I am guessing that the two were an expensive factor on the electricity meter. It took a full days work to get both machines back to clean and dry.

We went out afterwards and bought some food to last us the rest of our stay.
The fridge purred back into life when I switched it on and performed well for the rest of the time we were there.
The freezer was left switched off as we didn't need to freeze anything.

 OH began rubbing down paintwork in the bathroom and cleaned and treated the wall and ceiling to remove the mould build up.
The mould was caused by DD drying her clothes in there and her daily shower with the fan left switched off (I believe).

 Day 3

The steam cleaner was again useful to clean the tiling around the bath and restore the grout to something less revolting.
 I also steamed the window ledges and the Kitchen cupboard doors and handles which were grimy and food splattered.

DH retreated the mould areas and when it was dry, sealed the wall and ceiling with PVA. Then he rubbed down the back of the bathroom door which has a full length picture of a bathing beauty glued to it courtesy of the previous owner. We did not attempt to remove it, I have fond memories of removing glued on posters from wood because I worked in the photo exhibition industry and know that glue and wooden panels are a nightmare to clean back.

The cooker top needed only a light steam to remove some built up cleaning cream and as it is only about 6 weeks old, it was a quick job.
 The windows weren't too bad,just a standard clean with squeegee and washing up liquid. Outside is left alone.
The flat is on the 2nd floor and only the main window opens enough to clean both sides.

 Day 4

 More shopping. This time for Mattress covers, a few small tools and scratch restore pens for the floor. I found the pens in poundland. There is a big scratch under the living room door where something had got stuck and it was not easily removable. DH managed to get it out and it was a big piece of grit or gravel. That has been there since we bought the place .

 DH painted the bathroom woodwork and the door. An electrician installed a new extractor fan for us with a humidity controlled timer. He also moved the light in the bedroom so that it was in the middle of the room and not over the wardrobe.
I gave the woodwork a second coat while DH went for fish and chips.

 Day 5

We paint rolled the bathroom walls and ceiling with special paint. While DH gave it a second coat, I started to paint roll the living room. This is a big room maybe 15 feet square with slated ceiling at one side and so a lot of surface area. The ceiling needed doing in this room too.

On fitting a mattress cover to see how it looked, I discovered that it was a little large. This is because the last owner had bought a small double bed which was a non standard size. The mattress is fine and so a cover seemed the best bet. I spent the afternoon sewing the two covers to fit.

 I filled over some holes left by nails and screws in various places and a couple of larger holes caused by careless decorating or removals in the kitchen. One small area needed the wall paper removing and re-gluing as it was almost hanging in mid air.

 Day 6

 The builders came to paint the outside woodwork.
They are cheeky chappies.
 Builder 1 leaned out of the window and rubbed down the woodwork (it is a massive drop if he fell). He leant back in shaking and stressed out!
Then he produced a rope and handed me the end saying 'hold tight for just a wee while' and proceeded to lean a bit further while I held the end.
Obviously if he had fallen, there is no way I could hold his weight but I think he thought it added safety.
His crony, builder 2, appeared on the ladder outside and did the unreachable bits. Later they both came in and worked from inside. I was not happy to see them placing their cloddies all over the cleaned window ledges and even the bed.
Then they examined the concreting on the roof and made a note of what needed doing. We are responsible for the windows and their little dormer roofs .

DH painted the living room with plastic sheets over everything. I am the masker outer so that was all done before hand.

Day 7

The builders reappeared to apply a second coat and give an estimate on the concreting.
I was entertained with stories of terrible tenants who punished their kids by making them use their bedrooms as lavatories. Of tenants who bang up the heating and tape up all the air vents then dry their clothes everywhere resulting in mould(I didn't comment on DD's track record).
One of the builders said that some tenants will use candles rather than replace a light bulb and my mind shot to the candle burn on top of the bedroom chest of drawers and the candle wax that I encountered almost everywhere.

We cleared the bedroom (putting the bed in the living room) and I masked off for painting. The cupboards were filthy and so they got a thorough clean. DH paint rolled the walls to cover up the green .

 I started to paint the kitchen where I had reattached the paper and filled holes.

 Day 8

We finished the bedroom and replaced the bed.
 I cleaned the light shades with bread (it captures the dust and the crumbs disintegrate so it needs to be done over the bin).
The bin was cleaned to remove the food splats.
The kitchen was finished and the carpet was steamed to remove food splashes.

 Day 9

 Mastic day.

 I am the one who does the mastic work.

We had to attach a panel on the wall behind the bath. It covers the boiler and a cupboard above but you cant leave it as an opening cupboard because the shower would be unusable if you did. So it is screwed in place with covers on the screws and mastic is used to waterproof in front and behind the panel.
There was some to do behind the kitchen sink too. We found a tube of black had been left by one of the plumbers and so I filled in the missing 'disc' on the kitchen tap with a little bit to match the black disc on the other one.

 We hung the shower curtain. Fitted a kitchen cabinet with a mirror. Installed a shelf that sits around the basin.
I steamed the whole bathroom floor to zap any nasties hiding around the toilet etc.

 Day 10

 The builders arrived late.
They were there when I got back from the shop (travel food for the home journey).
DH was flustered and red faced.
Builder 2 in stepping on the worktop beside the sink, had caused a cracking sound and DH said the underside of the worktop was cracked. It wasn't visible from above or the sides.
I told builder 1 (the boss) that he should replace the top as they broke it.
He refused.
He told DH where he could get a matching piece to reinforce the counter and said he would pay for it.

 We felt caught out, we needed them to be gone and the work done so that the letting agent would see it finished and give us a price for letting. We were coming back home the same evening.
DH bought the wood and fitted it.
We tidied and vacuumed after the builders had left minus the price of the wood DH bought.

I filled in the scratches with the pen.It worked perfectly.

The letting agent rep came and looked around. He had been a few weeks previously when DD and BF were still here.
That time they had not been able to photograph it due to all the 'stuff' and possibly to the unkempt look of it. This time he nodded in approval.
The quote he gave us was 25 pounds more than the previous one so that was good.
 After he was gone we loaded the car for the journey and then got fish and chips(no washing up) We slept for about 2 hours before starting back.
We were home 12 hours and 600 miles later.

 How much did it cost?

 It was £810 for the builders.
 The petrol for the journey @ £140
 New fan Paint Light fittings
Spares for w-machine(knob) fridge(icebox door) freezer (inner flap)
 Electricity while there and until tenant installed (£35)
grub (takeaway and bought to cook/eat)
mattress covers/under sink shelf/bathroom cabinet
Mirror for hallway
Sundries (screws,glue, rollers, brushes) @ £350
So far around £1300
I haven't added the cost of the electrician as we haven't had the bill yet.
We still need to get a smoke alarm wired in.

The steam cleaner will be used at home so I didn't add that (£30)cost either.
 It was well worth it.
A company hired to come in and do it would have scrapped the fridge and freezer and we would have needed a new washer dryer because the dryer knob(£8 to replace after a little research) was broken.
That would have been a minimum of  £700 for machines alone.
I have no idea how much cleaning would have been and it would have needed at least the kitchen carpet steamed in that price.

*Looking online it seems that an 'end of Tenancy clean with steamed carpets' could be £150 for the size of the flat, I think that is without any clearing of stuff left behind and certainly with no maintenance  or decorating so looks like we made the right decision to do it ourselves*

The estimate for letting was £25 more per month which is £300 over a year

*Actually it was £ 75 a month more and was priced to let  at £50 a month more to see how many bites could be got. If it does well at £50 more,I am happy with that as it is £600 more than we thought it would let for over a year.*

DS is happy, he was reunited with his suit and shoes and the iron he bought and forgot when he came home. We also found one of his old phones, a pair of  expensive gloves,his mini fridge  and his wooly hat.

I brought home 2 towels,a tea towel,a pillow,pillow case, a casserole and a big square pie dish,
the old hose from the broken vacuum which we replaced (it fits my ordinary vacuum and my wet and dry machine).  We also salvaged a wooden venetian blind DD bought in error as it was too small.(its fits our stair window perfectly at home so we bought it from her.These things were not needed at the flat but too good to throw away.

We threw away, 2 chairs (replaced with new padded fold up chairs).
The old extractor (new one is more efficient)
A lamp shade (was awful)
The clothes rack (so people are more likely to use the garden clothes line or the dryer)
and the old round pedestal table which was coming apart(replaced with a nest of 2 pine tables).
The chairs and the rack were left where someone could take them if they wanted to.


Monday, 11 June 2012

The Tomatoes are unleashed

I spent all Saturday afternoon mowing our lawn,then strimming the edges.
 ( We call 'weed wackers', 'strimmers' in the UK) .

We bought a much longer electric flex a couple of weeks ago because OH is slowly erecting a fence and the cable we had was much too short for him to use an electric drill. At first we thought we would just see if we could borrow the extension cable from a neighbour but then I realised it would be better to buy one ourselves as then I can use the strimmer and the hedge clippers in the veg plot and beyond as well.

Anyway,the plan worked well because I lopped off a lot of bramble and nettles straight after we bought it and this week,the strimmer helped hugely in tidying up the paths and weedy growth down there.
The whole thing from getting out the mower, to putting away the Strimmer, took about 3 1/2 hours with a short 15 minute intermission while I discovered why the power wasn't getting through towards the end of mowing.

It turned out to be a break in the wire where it fits into the plug ,invisible because it had broken inside the  plastic cover of the cable but not too frustrating because having eliminated everything else,it was the only thing left .

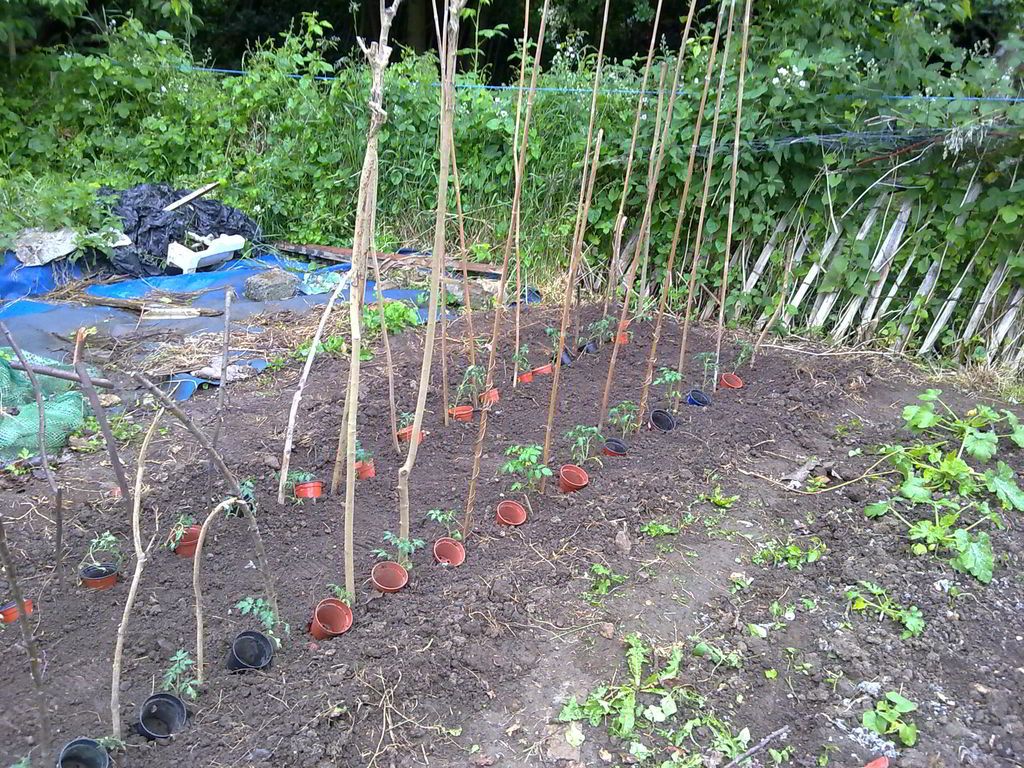
On Sunday, I got out the 2 Wheel hoes again.
First I used the cultivating teeth to loosen up my latest cleared bed, then the little rake (it's actually a bit too small) was fitted on, to clear the roots.

Lastly,I made two furrows with the ridger,one on either side of the bed.

The Tomatoes were then spaced out in the furrows and their pots put alongside them.
A bamboo cane was planted on the other side and I covered each plant using a trowel so I could right the plants individually and make sure the pots didn't get filled with mud.

I ran out of canes but there were plenty of branches lying around under the trees from our hedging escapades so that was no problem.

It rained quite hard for most of the rest of the day so they got a good watering in. Eventually they will be watered through the pots,hence their being planted beside one each. 
The idea is that the roots are the part of the plant that needs the water and if you water straight into the pot, it gets there, rather than evaporating . We have used this method before to good effect.

I haven't grown tomatoes for a couple of years. 
One year we had blight which usually affects a whole area as it is air born.
Last year I didn't grow anything at all because of  working from home becoming all encompassing.

Next I used the stirrup hoe on the other wheel hoe to weed everywhere it would fit.
I can sort of weed the onion beds with it but when I planted them out last Autumn, I forgot to measure how wide the Jalo was and so there are a few bits where only a hand hoe will fit.

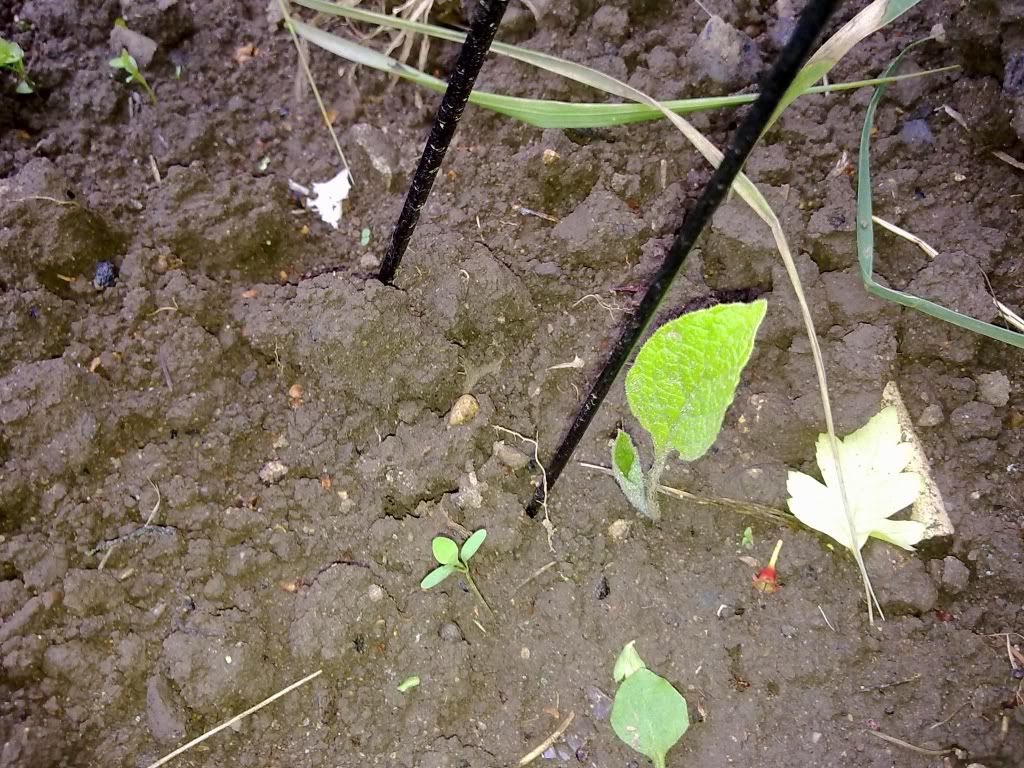
The Comfrey is beginning to show at last!
It is that little bright green leaf beside the umbrella-stay which I put there to mark where each piece of cutting was planted and hopefully keep OH's giant cloddies off it ,not to mention the cats.

There are 12 pieces in there and so far 6 are peeping out.
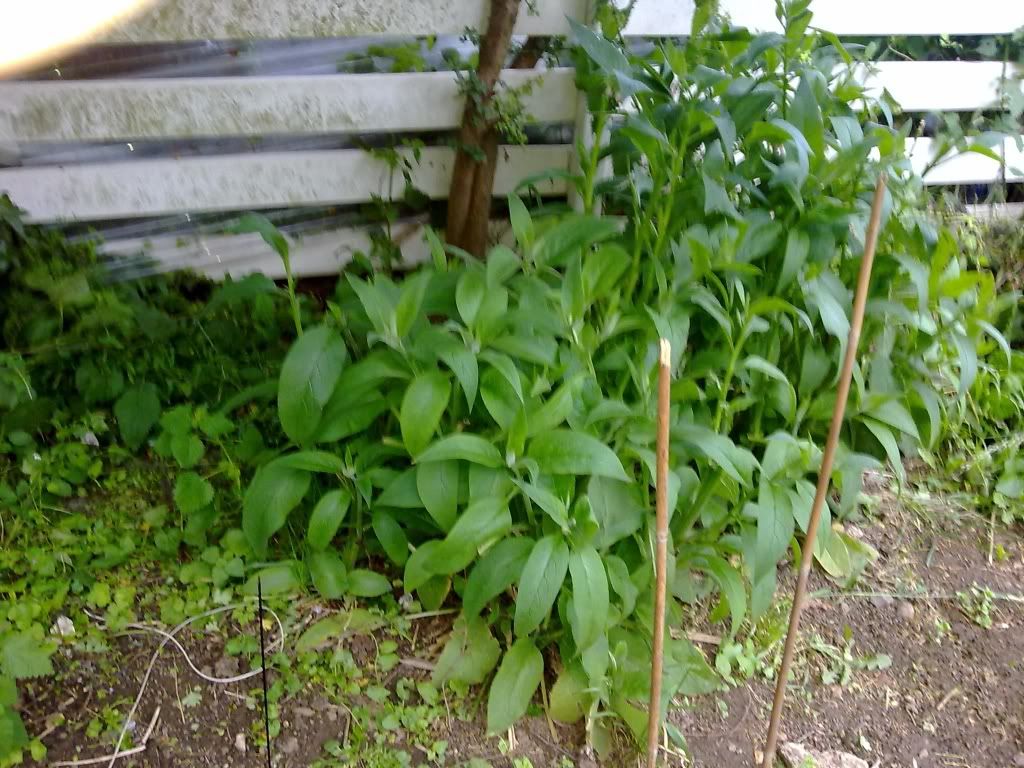
In the Autumn,I will make cuttings myself from the older clump that was planted about 5 years ago.

I wanted that clump to be well established before dividing it because despite having bought it from the HDRA and receiving 10 cuttings, only 3 or 4 came up.
Eventually I hope to line the edge of the plot using cuttings as it is so useful and because we have the Russian Comfrey variety, it is non invasive.

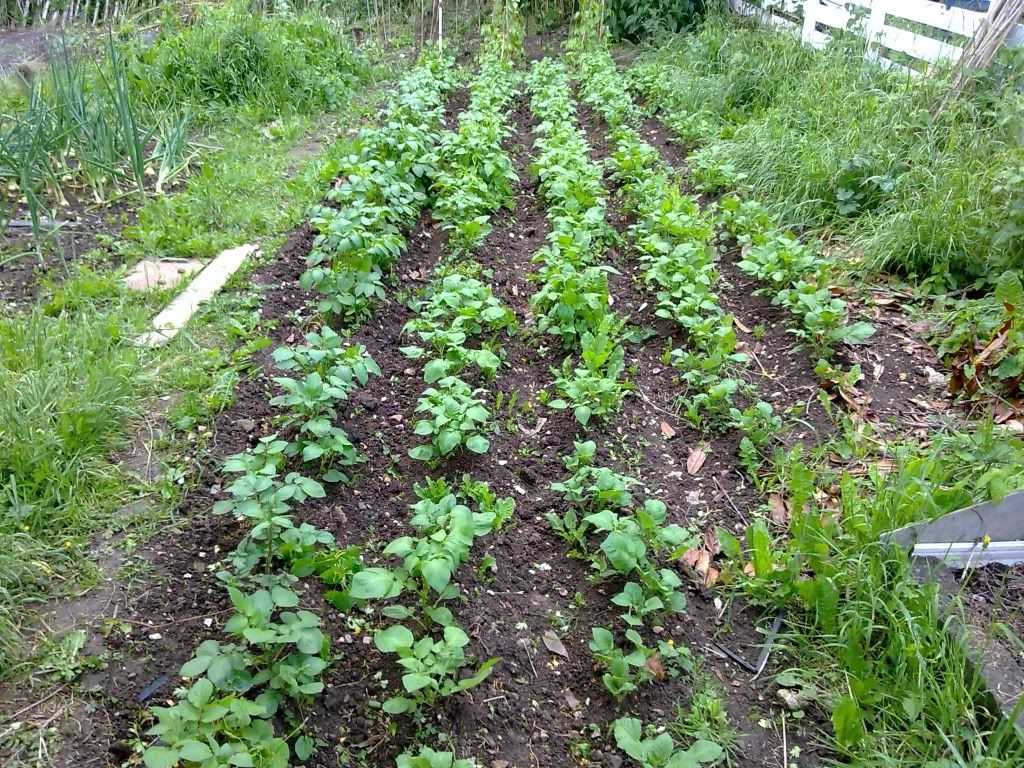
After the weeding,I whooshed the Jalo up and down between the spuds and then with the ridger still on the other Jalo (hence the usefulness of having two).
I swooped between the rows again and tidied them up.
That may well be the last earthing up they need this year because the canopy of leaves will soon meet overhead and once it does,the weeds are not such a problem.

Here they are from about 2 weeks ago. They leaves are much more prolific now.
The weeds on the right are strimmed off now too and the left hand path is strimmed.

More about the Victorian seeders and the Jalo Gardener Hoes

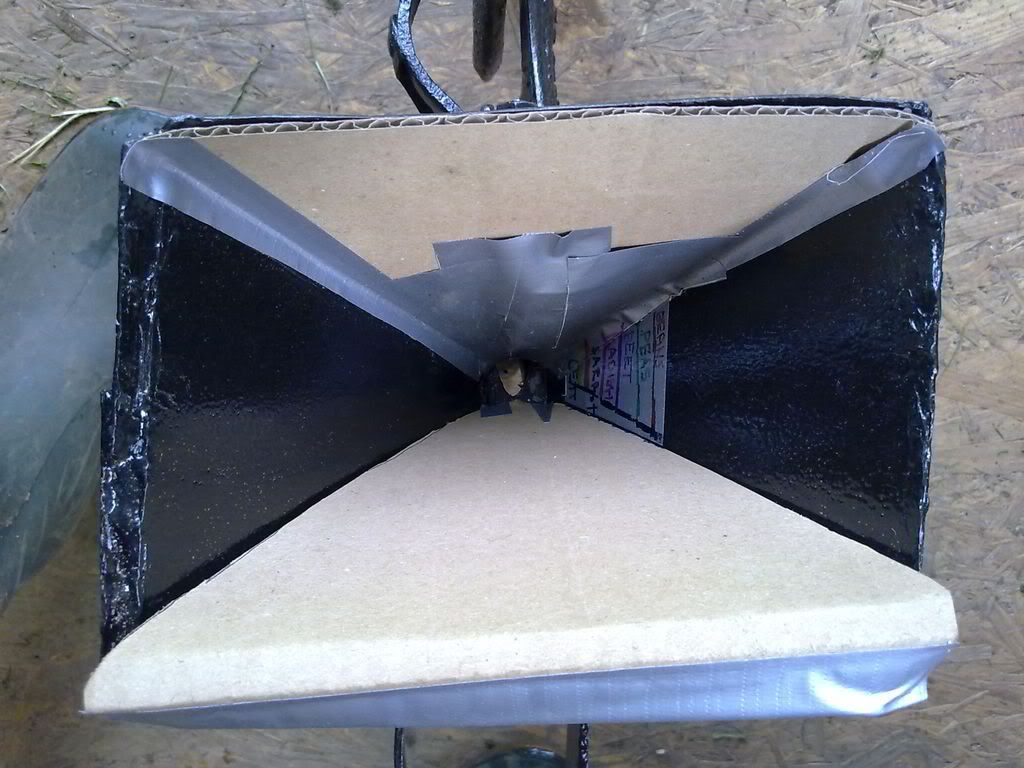
I managed to get a picture of the inside of the victorian seeder at last!
This is looking down with the front of the hopper at the top of the pic.
The hopper is bottomless and there is a sliding plate below,on which it sits fairly snuggly.
It isn't really easy to see but there is a bullet shaped hole on the sliding plate .
This is set to almost fully open in the picture and the white shape at the bottom is the floor of the shed seen through the bullet shaped hole and the seed chute beneath.

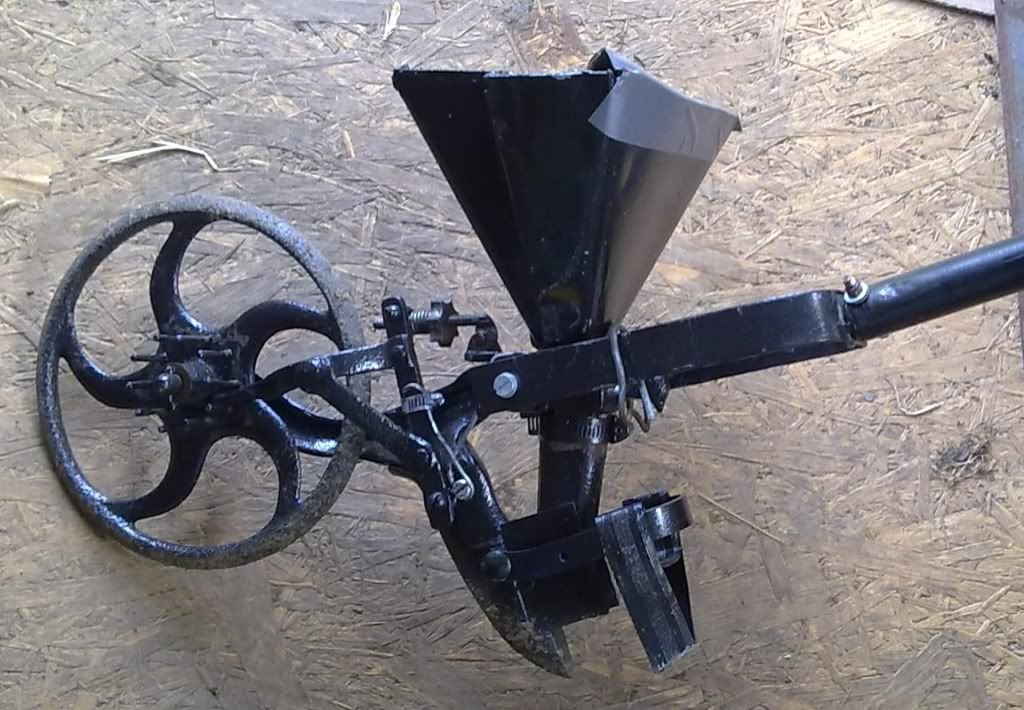
Here it is from the side.
The Wheel has prongs all around the hub.
There is a metal pointer which rests on the prongs and when the wheel rotates, the pointer is forced up and down.
At the other end of the pointer is a bolt with an adjustable knob.
The bolt is connected to the slider plate with the bullet hole in it.
So when the pointer is forced up and down, the plate must push backwards and forwards under the hopper.
A strong spring makes sure the pointer stays against the wheel prongs.

When the plate is in the forward position,the hole is shut because it is no longer under the hopper.
When the plate is back, the hole is open and depending on where you have adjusted the knob, it allows a seed or some seeds to drop through.
There is no adjusting for distance between seeds but as the plate takes longer to expose the complete hole when planting bigger seeds, the distance is further apart.

My French beans were around 4" apart when they emerged. There were a few skipped places but the cats had been in and scratched up a lot of the bed during the night and I had to keep pushing seeds back in for a few days.

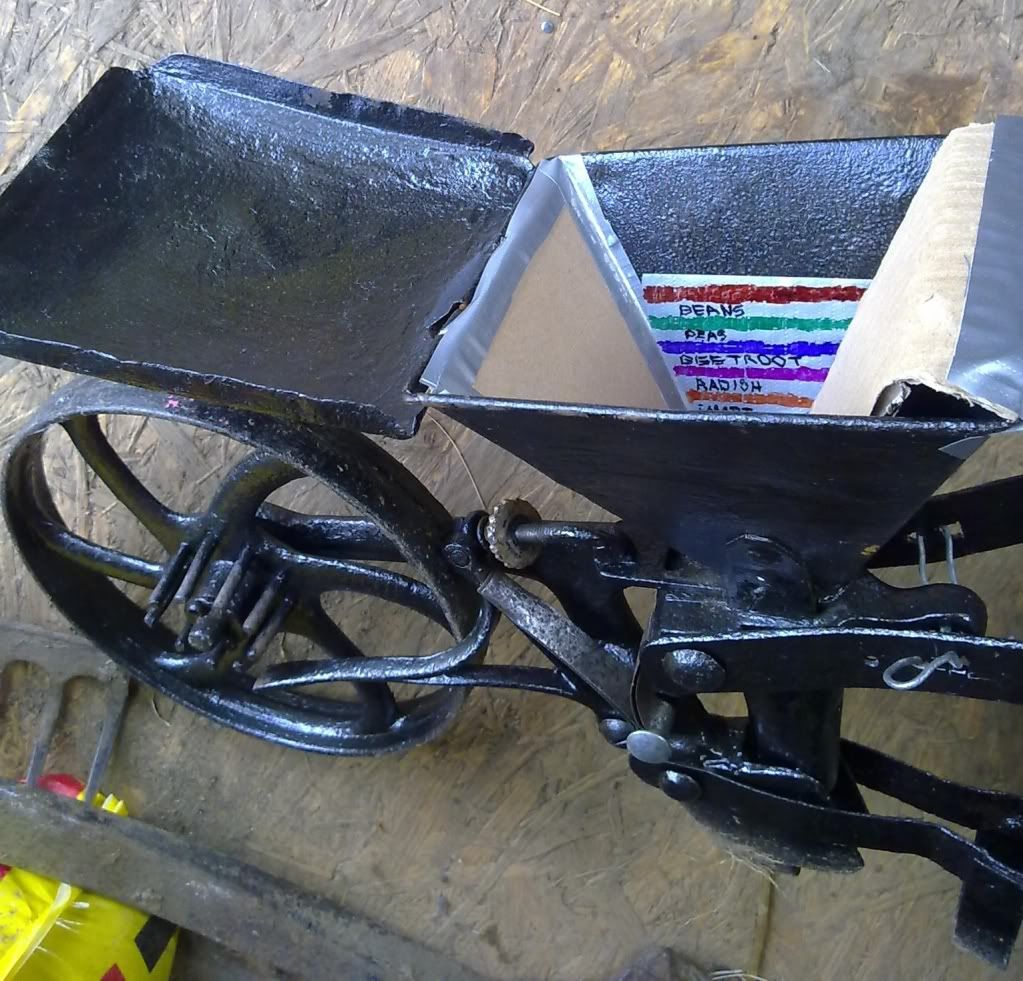
Originally I didn't have the cardboard in it but the seeds got left at the back of the hopper too often so the cardboard is sitting on the little prong which is on the slider plate behind the hole (I assume to stop the plate from shooting out too far).
The cardboard shoots forward as the sliding plate moves and that helps to bounce the seeds to the front.

It needs a lid else the seeds sometimes leap out of the top due to the springy action.so I cover it with a plastic bag and hold it on with elastic. This works very well as you can see when it is empty and if you lay the seeder down,the seeds don't all tumble out.

The seeder in the picture is probably the older of the two as it has' Le Butt of Bury St Eds' on the side.
The maker is Josiah Le Butt who invented it in 1869.
I made the hopper on this one as the original had broken off and was gone.


The other one is not branded at all and the wheel rim is flatter. The original lid and hopper are still strong.


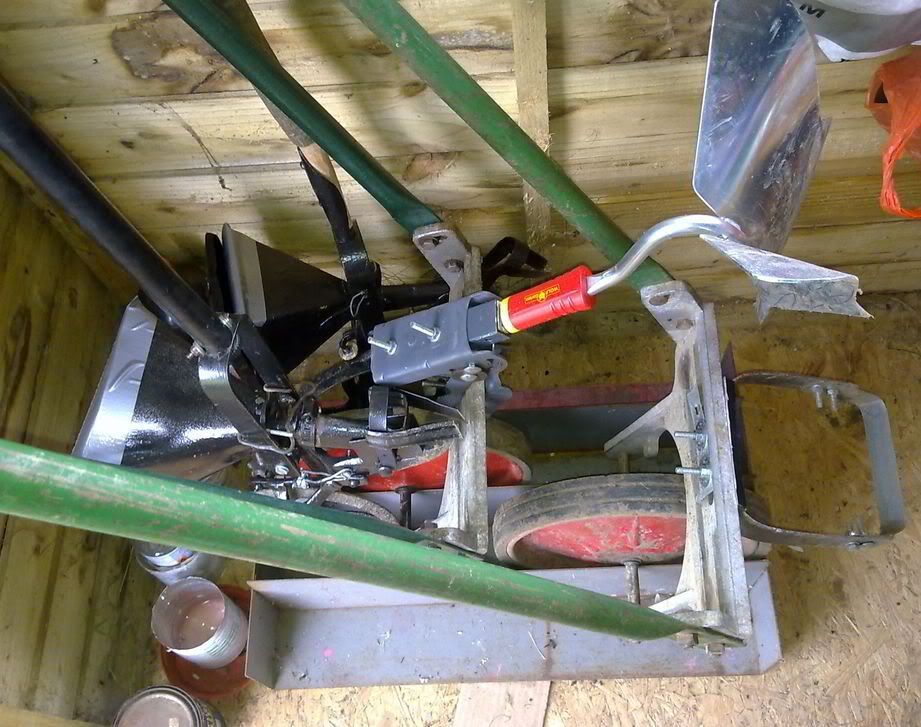
I have a metal shelf fitting for a stand for the two seeders and the Jalo wheel hoes.

It means they can all stand in the corner of the shed near the door and not take up too much room.
In the picture, the stirrup hoe is still bolted to the older Jalo and the Ridger is fitted onto the bracket I made on the other one.
The Hoe with the ridger is now painted and de rusted and looks much better than it did when I got it.
What I originally thought was a thicker handle ,was in fact just layers of thick blobby paint .
The two hoes are almost identical now it is painted.
The only difference I can see, is the wheel on the one,has a star pattern (you can just see it in the photo ).
The other is smooth.


Wednesday, 9 May 2012

Amateur metal working

I have been making bits for my wheel hoe.
Well , one bit really.
It is an oscillating hoe.
A lot of the new wheel hoes have them and I thought I would try my hand at a home made one.

Mine is made from a strip of iron bar we had, and 11 inches of a 24" steel rule(OH's late father had them everywhere so we had a surplus).
The steel rule is the blade.

So far I have had it working but the oscillating bit needs some fiddling to get it right.

I needed to bend the steel and used some pieces of wood and my own weight and a club hammer.
Once bent into two Stirrup shapes,one bolts to the other and all are bolted to the wheel hoe.
The oscillating bit is a little piece of metal that has a small space for the blade to wobble within so that it swings ever so slightly as you push back and forth but not enough to let it erode the metal or the bolts.
The deliberate agrarian has a few pictures of his own that he makes to go with his 'planet Whizz bang hoe' so that was a handy guide.

Also I have been playing with a couple of Absolutely ancient seeders.
They are from the late 19th Century I think as the only info I could find on the WWW was for one made around 1879 and is very similar with the same makers name.

They came as a pair because they were incomplete but there was enough there to make one whole machine with a bit of fiddling.
It seemed a shame to just discard the other parts so I have been fabricating my own replacement bits using the Dremel, a hack saw, a drill and several old bits of metal from things we had lying around broken.
I have one working and needing a new handle and paint the other is working,needs a better handle and paint.

The one with no handle has part of an old wooden one still stuck in the metal handle bracket so I have some work to do to get that out,the screws holding it in are stuck fast.
The other has a thin handle I connected to it rather weedily and although it does work as a handle, it isn't robust enough and will need replacing.


This morning I dug my bean trenches (finally).
The weather is still one long round of drizzle or mizzle or just thin rain.
Grey clouds and cool wind.
The beans are becoming taller and are going to need to go outside in about a week, so the trenches are dug and comfrey is laid in them thickly to act as a fertilizer.

The spuds are just starting to show their leaves.
The row with the shop bought seed potatoes anyway.
The others will show up in their own good time. They were not as far along in the chitting when they went in so will be later to surface too.

Everything in the garden is nestling in a cloddy mess.
The strawberries have loads of flowers and the rhubarb is doing well.
They don't mind the rain although it does encourage the slugs as well which means keeping an eye on the strawberries as they will hollow them out if they can get to them.

Tuesday, 27 March 2012

Make do and mend Tuesday

Reframing the frame

The cold frame has seen better days.
It started off as an angled frame made from old shelving with half a glazed door for the cover.
After a couple of years, the cover got smashed when a piece of roof tile was blown through the glass.
Then for the last 2 or three years, it has had a PVC cover made from an old PVC greenhouse cover,cut down.
This last winter it split and became useless.
I decided it was time for a new top so this afternoon was spent sawing wood to make a sturdy frame on which to affix some more of the greenhouse cover(I never throw anything away if it looks to be future recyclable.
The cover is tied down to a hook on the main body of the cold frame so hopefully will last a while before needing replacing again.

Our big shed windows could do with replacing too.
They are made from old push chair PVC rain covers.
The covers have eventually split (after about 20 years of use).
There is easily enough PVC Greenhouse cover left to remake them.

Shoe goo

My zip up shoes have needed mending for ages.
They are light weight ,comfortable shoes but the sole, being light weight ,was splitting and two pieces had fallen out of one shoe sole.
I bought some shoe goo a while ago and have used it to mend some slippers for indoors but this is the first time that it has been used to mend out door shoes.
It is a black, rubbery substance that dries flexible, black and shiny so ideal for shoes.
They are drying off in the shed (the shoe goo is quite strong smelling) and I will try them outside in a few days.