Showing posts with label Wheel hoe. Show all posts

Monday, 11 June 2012

The Tomatoes are unleashed

I spent all Saturday afternoon mowing our lawn,then strimming the edges.
 ( We call 'weed wackers', 'strimmers' in the UK) .

We bought a much longer electric flex a couple of weeks ago because OH is slowly erecting a fence and the cable we had was much too short for him to use an electric drill. At first we thought we would just see if we could borrow the extension cable from a neighbour but then I realised it would be better to buy one ourselves as then I can use the strimmer and the hedge clippers in the veg plot and beyond as well.

Anyway,the plan worked well because I lopped off a lot of bramble and nettles straight after we bought it and this week,the strimmer helped hugely in tidying up the paths and weedy growth down there.
The whole thing from getting out the mower, to putting away the Strimmer, took about 3 1/2 hours with a short 15 minute intermission while I discovered why the power wasn't getting through towards the end of mowing.

It turned out to be a break in the wire where it fits into the plug ,invisible because it had broken inside the  plastic cover of the cable but not too frustrating because having eliminated everything else,it was the only thing left .

On Sunday, I got out the 2 Wheel hoes again.
First I used the cultivating teeth to loosen up my latest cleared bed, then the little rake (it's actually a bit too small) was fitted on, to clear the roots.

Lastly,I made two furrows with the ridger,one on either side of the bed.

The Tomatoes were then spaced out in the furrows and their pots put alongside them.
A bamboo cane was planted on the other side and I covered each plant using a trowel so I could right the plants individually and make sure the pots didn't get filled with mud.
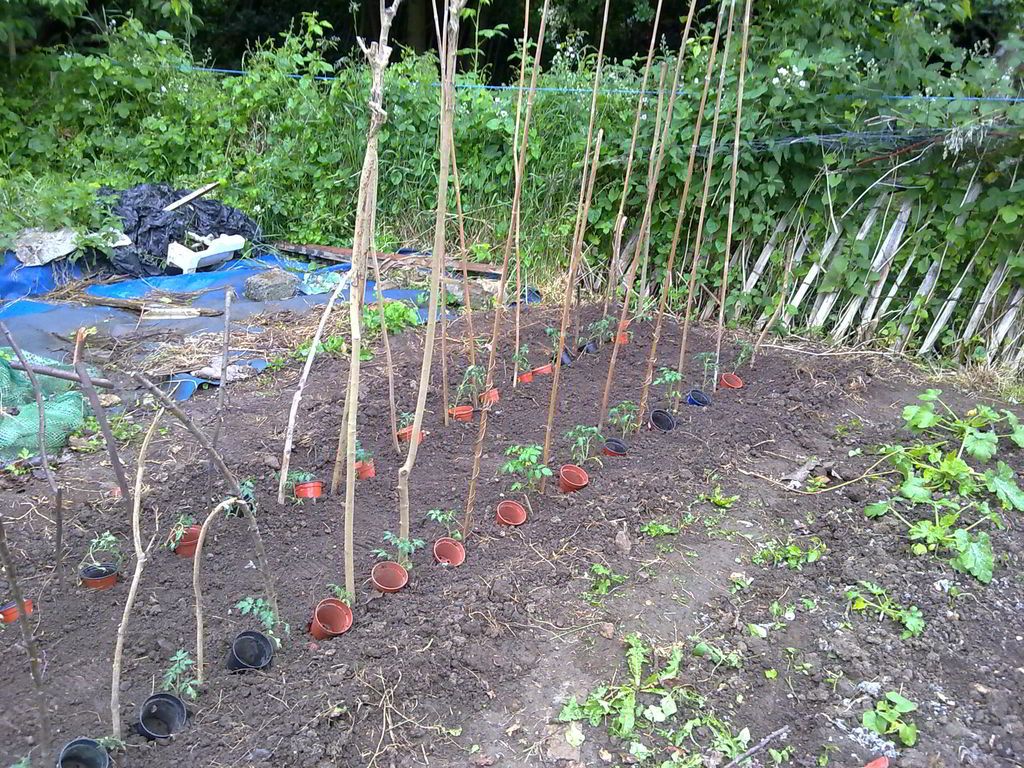
I ran out of canes but there were plenty of branches lying around under the trees from our hedging escapades so that was no problem.

It rained quite hard for most of the rest of the day so they got a good watering in. Eventually they will be watered through the pots,hence their being planted beside one each. 
The idea is that the roots are the part of the plant that needs the water and if you water straight into the pot, it gets there, rather than evaporating . We have used this method before to good effect.

I haven't grown tomatoes for a couple of years. 
One year we had blight which usually affects a whole area as it is air born.
Last year I didn't grow anything at all because of  working from home becoming all encompassing.

Next I used the stirrup hoe on the other wheel hoe to weed everywhere it would fit.
I can sort of weed the onion beds with it but when I planted them out last Autumn, I forgot to measure how wide the Jalo was and so there are a few bits where only a hand hoe will fit.

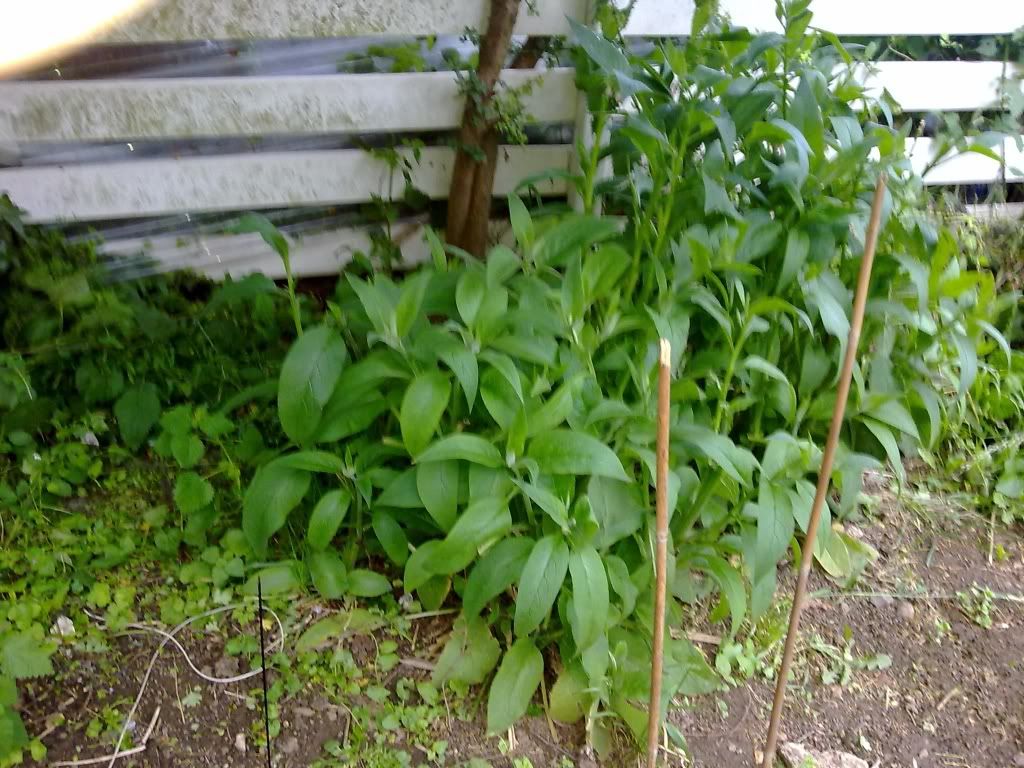
The Comfrey is beginning to show at last!
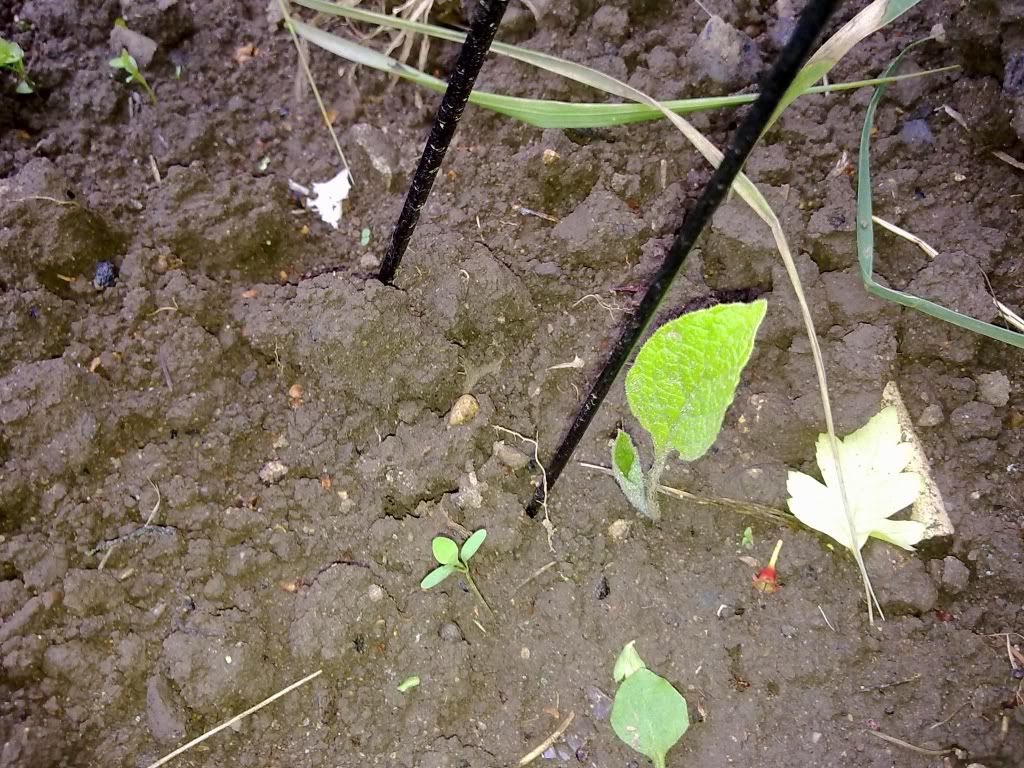
It is that little bright green leaf beside the umbrella-stay which I put there to mark where each piece of cutting was planted and hopefully keep OH's giant cloddies off it ,not to mention the cats.

There are 12 pieces in there and so far 6 are peeping out.
In the Autumn,I will make cuttings myself from the older clump that was planted about 5 years ago.
I wanted that clump to be well established before dividing it because despite having bought it from the HDRA and receiving 10 cuttings, only 3 or 4 came up.
Eventually I hope to line the edge of the plot using cuttings as it is so useful and because we have the Russian Comfrey variety, it is non invasive.

After the weeding,I whooshed the Jalo up and down between the spuds and then with the ridger still on the other Jalo (hence the usefulness of having two).
I swooped between the rows again and tidied them up.
That may well be the last earthing up they need this year because the canopy of leaves will soon meet overhead and once it does,the weeds are not such a problem.
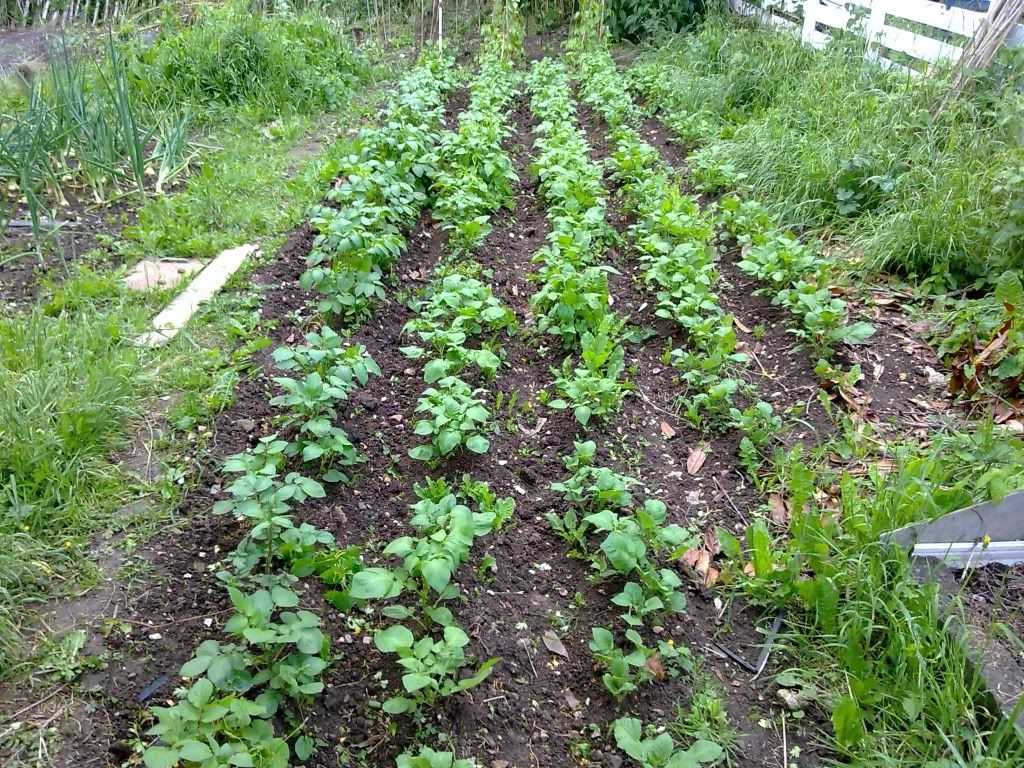
Here they are from about 2 weeks ago. They leaves are much more prolific now.
The weeds on the right are strimmed off now too and the left hand path is strimmed.

More about the Victorian seeders and the Jalo Gardener Hoes

I managed to get a picture of the inside of the victorian seeder at last!
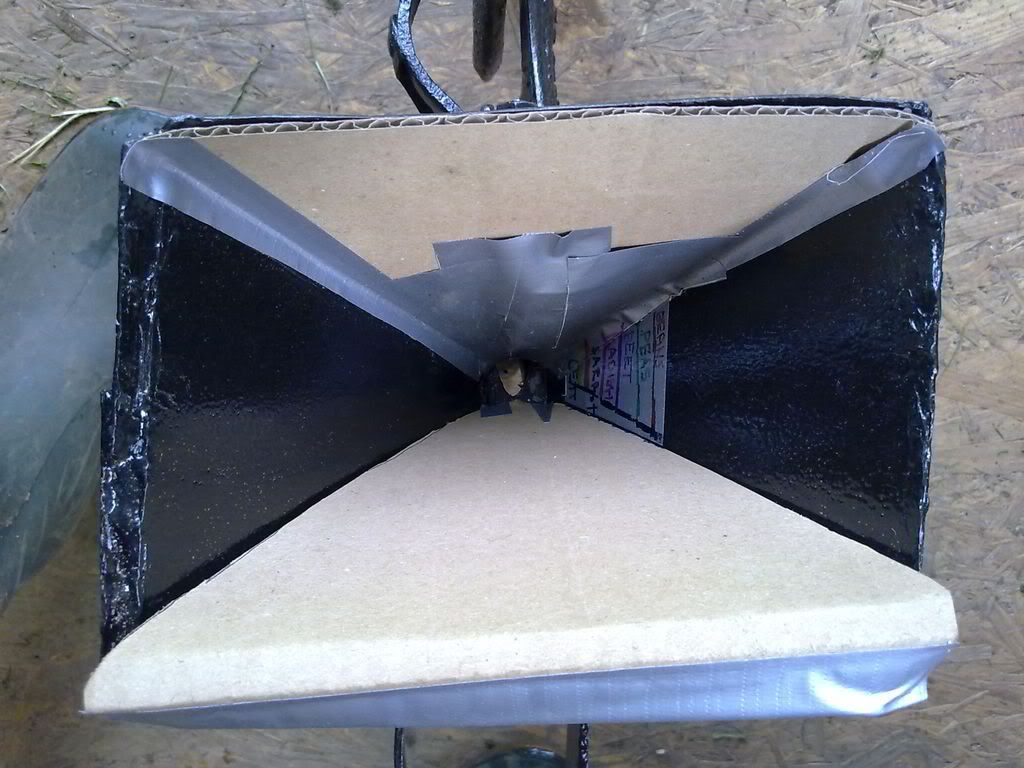
This is looking down with the front of the hopper at the top of the pic.
The hopper is bottomless and there is a sliding plate below,on which it sits fairly snuggly.
It isn't really easy to see but there is a bullet shaped hole on the sliding plate .
This is set to almost fully open in the picture and the white shape at the bottom is the floor of the shed seen through the bullet shaped hole and the seed chute beneath.
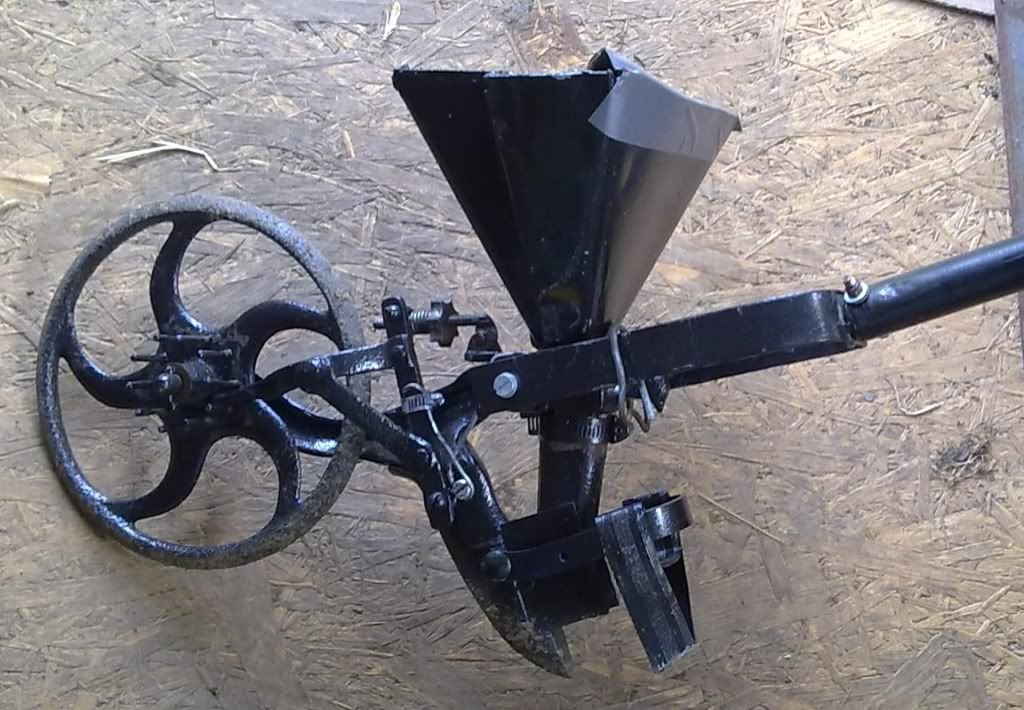
Here it is from the side.
The Wheel has prongs all around the hub.
There is a metal pointer which rests on the prongs and when the wheel rotates, the pointer is forced up and down.
At the other end of the pointer is a bolt with an adjustable knob.
The bolt is connected to the slider plate with the bullet hole in it.
So when the pointer is forced up and down, the plate must push backwards and forwards under the hopper.
A strong spring makes sure the pointer stays against the wheel prongs.

When the plate is in the forward position,the hole is shut because it is no longer under the hopper.
When the plate is back, the hole is open and depending on where you have adjusted the knob, it allows a seed or some seeds to drop through.
There is no adjusting for distance between seeds but as the plate takes longer to expose the complete hole when planting bigger seeds, the distance is further apart.

My French beans were around 4" apart when they emerged. There were a few skipped places but the cats had been in and scratched up a lot of the bed during the night and I had to keep pushing seeds back in for a few days.

Originally I didn't have the cardboard in it but the seeds got left at the back of the hopper too often so the cardboard is sitting on the little prong which is on the slider plate behind the hole (I assume to stop the plate from shooting out too far).
The cardboard shoots forward as the sliding plate moves and that helps to bounce the seeds to the front.

It needs a lid else the seeds sometimes leap out of the top due to the springy action.so I cover it with a plastic bag and hold it on with elastic. This works very well as you can see when it is empty and if you lay the seeder down,the seeds don't all tumble out.

The seeder in the picture is probably the older of the two as it has' Le Butt of Bury St Eds' on the side.
The maker is Josiah Le Butt who invented it in 1869.
I made the hopper on this one as the original had broken off and was gone.
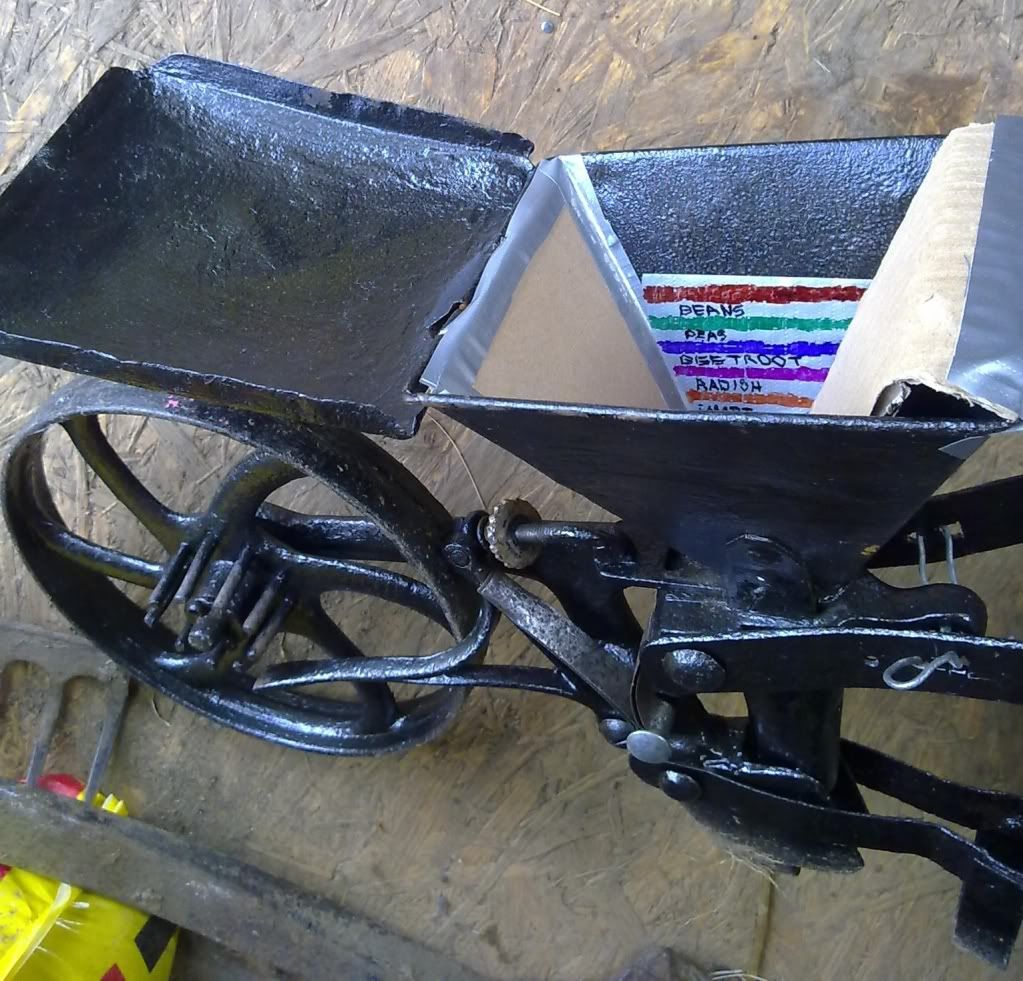

The other one is not branded at all and the wheel rim is flatter. The original lid and hopper are still strong.


I have a metal shelf fitting for a stand for the two seeders and the Jalo wheel hoes.
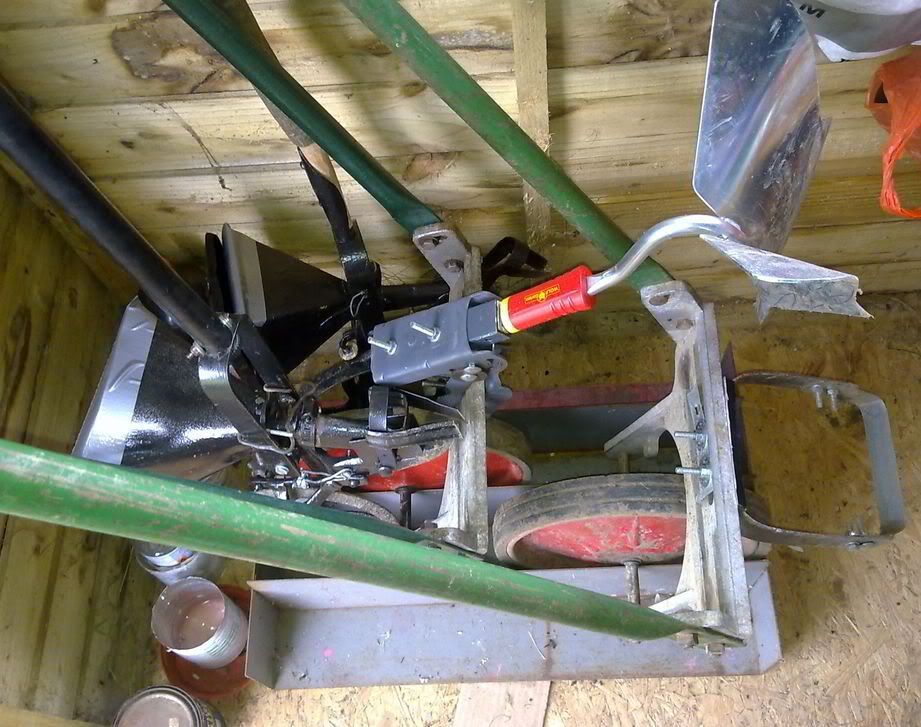
It means they can all stand in the corner of the shed near the door and not take up too much room.
In the picture, the stirrup hoe is still bolted to the older Jalo and the Ridger is fitted onto the bracket I made on the other one.
The Hoe with the ridger is now painted and de rusted and looks much better than it did when I got it.
What I originally thought was a thicker handle ,was in fact just layers of thick blobby paint .
The two hoes are almost identical now it is painted.
The only difference I can see, is the wheel on the one,has a star pattern (you can just see it in the photo ).
The other is smooth.


Wednesday, 9 May 2012

Amateur metal working

I have been making bits for my wheel hoe.
Well , one bit really.
It is an oscillating hoe.
A lot of the new wheel hoes have them and I thought I would try my hand at a home made one.

Mine is made from a strip of iron bar we had, and 11 inches of a 24" steel rule(OH's late father had them everywhere so we had a surplus).
The steel rule is the blade.

So far I have had it working but the oscillating bit needs some fiddling to get it right.

I needed to bend the steel and used some pieces of wood and my own weight and a club hammer.
Once bent into two Stirrup shapes,one bolts to the other and all are bolted to the wheel hoe.
The oscillating bit is a little piece of metal that has a small space for the blade to wobble within so that it swings ever so slightly as you push back and forth but not enough to let it erode the metal or the bolts.
The deliberate agrarian has a few pictures of his own that he makes to go with his 'planet Whizz bang hoe' so that was a handy guide.

Also I have been playing with a couple of Absolutely ancient seeders.
They are from the late 19th Century I think as the only info I could find on the WWW was for one made around 1879 and is very similar with the same makers name.

They came as a pair because they were incomplete but there was enough there to make one whole machine with a bit of fiddling.
It seemed a shame to just discard the other parts so I have been fabricating my own replacement bits using the Dremel, a hack saw, a drill and several old bits of metal from things we had lying around broken.
I have one working and needing a new handle and paint the other is working,needs a better handle and paint.

The one with no handle has part of an old wooden one still stuck in the metal handle bracket so I have some work to do to get that out,the screws holding it in are stuck fast.
The other has a thin handle I connected to it rather weedily and although it does work as a handle, it isn't robust enough and will need replacing.


This morning I dug my bean trenches (finally).
The weather is still one long round of drizzle or mizzle or just thin rain.
Grey clouds and cool wind.
The beans are becoming taller and are going to need to go outside in about a week, so the trenches are dug and comfrey is laid in them thickly to act as a fertilizer.

The spuds are just starting to show their leaves.
The row with the shop bought seed potatoes anyway.
The others will show up in their own good time. They were not as far along in the chitting when they went in so will be later to surface too.

Everything in the garden is nestling in a cloddy mess.
The strawberries have loads of flowers and the rhubarb is doing well.
They don't mind the rain although it does encourage the slugs as well which means keeping an eye on the strawberries as they will hollow them out if they can get to them.

Thursday, 26 April 2012

Finally Pics of my Jalo Gardener Bracket !

We have had rain for days and days.
Today I actually got out into the garden with my phone which has a camera on it.

I got some digging done with the Trusty Azada.

Photobucket
The junk lying on the ground  is all the stuff I have got covering the 'cleared but not working on at the moment' earth.
The blue thing at the far end,is the old car cover thing that was left here when we moved in 24 years ago.
It is thick plastic and quite heavy.
From there on,is all weeds and trees.

Photobucket
It was quite cloddy but I pesevered.
This more ploughed bit is hopefully going to be for the beans.
The bit of wooden fence was chucked into the garden by a neighbour in the houses along the bottom behind a 6ft fence. I have it for walking across the mud at the moment.

Next I got the new Toy (A Jalo with cultivating teeth/Tines YAY) and gave that a try.
I was looking on Ebay for the tines for my other Jalo and found this .
Often you will see either Jalo or planet junior hoes with various tools very cheaply because they are collection only but I was lucky with this one as the owner had offered delivery too.

The last one I saw with many tools, went for about £90 and there is one up there today with about 5 days to go, that will sell very well despite being collection only I think, as it has every tool that Jalo produced  apart from a seeder.

This one was £27 . I thought that was a bargain because 3 Tines from America (only place selling them new) is about £53. I paid £ 15 for the delivery and it came in 2 days so that was very good value and far cheaper than driving half way across the country to collect it.

The Tines are in very good nick with only light surface rusting which was easily removed with a light rub down and the handle of the machine could really do with a rub down and paint just to smarten it up.

Photobucket

Photobucket
The teeth work well and go quite deeply after the Azada has broken the ground.
I have 5 teeth or tines for it but have only got 3 on it in the 2nd picture as it is so muddy today.
Then I changed the teeth to the plough fitting (which I bought on Ebay a few weeks back for £12 delivered) and ploughed for a while.
I forgot to get a picture of the plough .

Last of all, I got the other Jalo out of the shed to take some pictures of the new bracket that I made last week.
Photobucket

Photobucket
My Bracket made from a  cut down  Satellite dish bracket .

I made this because you don't often see single tools for sale with delivery for the Jalo.
You have to look for weeks and weeks before one turns up and then of
course you must bid for it.
That can push the price up too far.

We have a few wolf multichange tools that we bought before we moved here and I have one or two newer ones ,they are the type that all fit into one handle ,so the bracket has furnished me with all the other tools I might want for my wheel hoe.

The wolf tool handles slide into the rectangular tubing,with a small slither of rubber just to make it a firm fit.
Then just do up the bolt.

It works perfectly and I can fit the wolf tools into the bracket and have it set to any angle along one axis ,so that it can be for deep or shallow use.
That is massively improved on my first bracket which was just a tab to hold the wolf handle steady against the frame.
The first attempt worked perfectly too but I had no depth control except that of lowering or raising the handle angle by holding it differently which was awkward.

The Bracket simply unbolts from the Jalo if I want to use it without.
No drilling or cutting on the trusty old tool.
 Photobucket Photobucket

These machines really help with a vegetable garden ,especially if you are tackling the work single handed.. They take a lot of the slog out of the work.
I think it is because you are pushing and pulling like you do with a mower but you are not having to also take the weight of the tool. Even the wolf tools are easier because you have two hands to do the propelling rather than one.

Wednesday, 11 April 2012

Pictures of the garden

I thought it was about time I got the camera into commission once again.
So here it what I have been up to these hols.
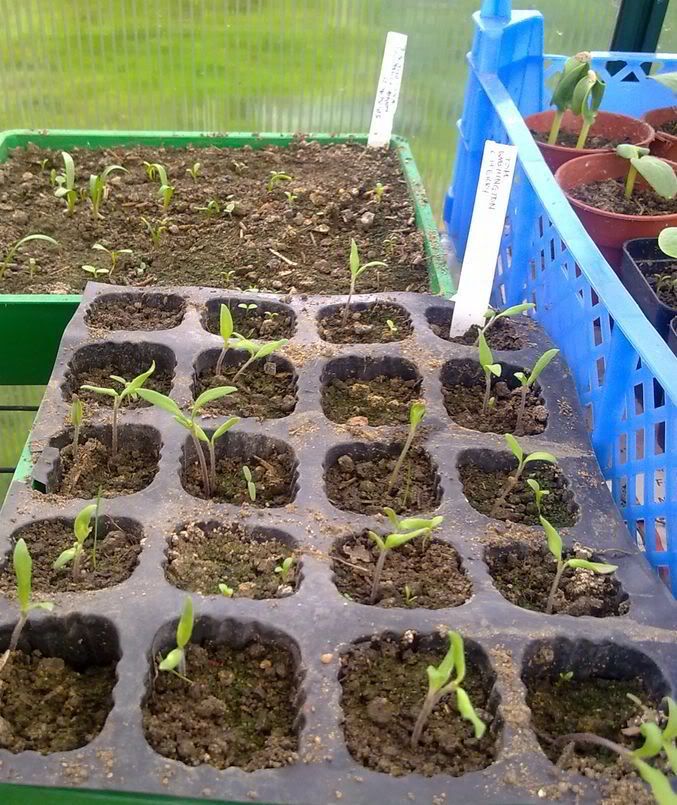
Cherry Tomatoes just coming up,they are a variety called cherry Bell that I haven't tried before.


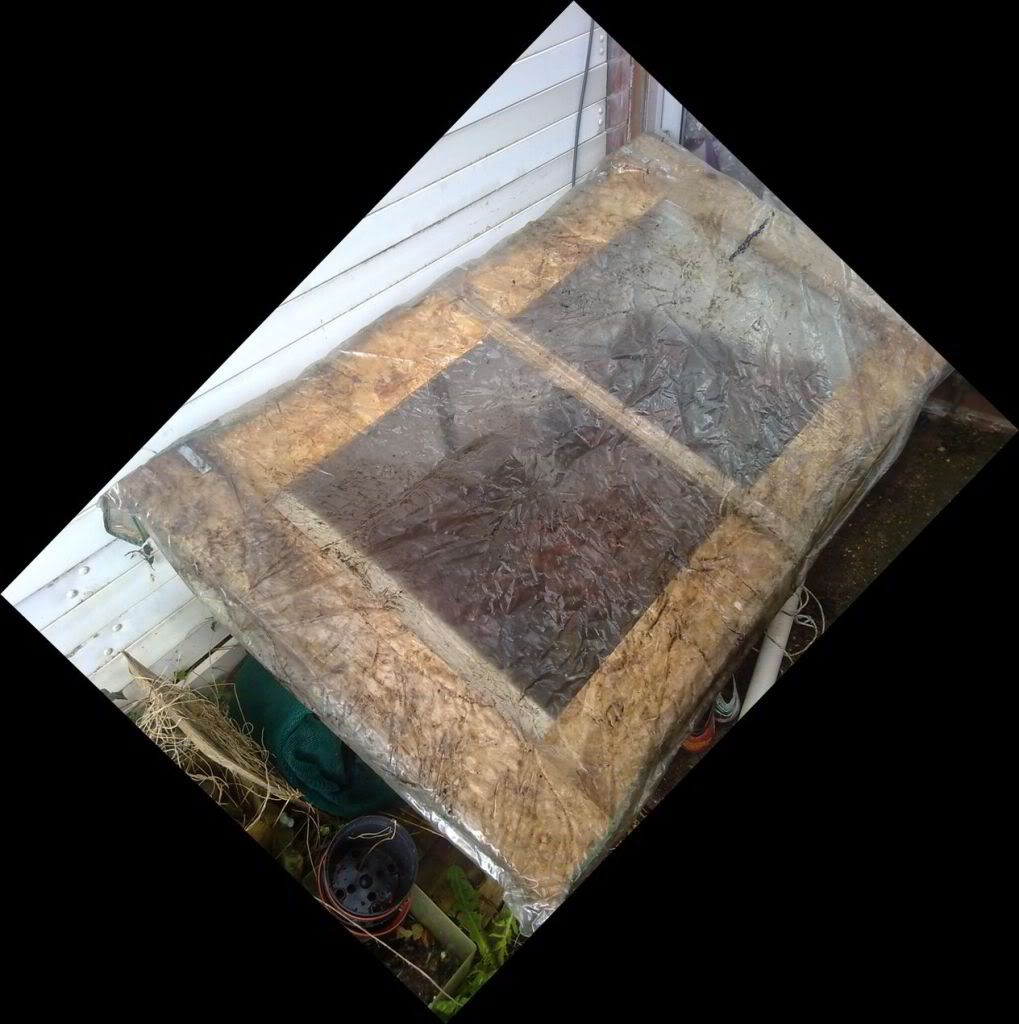
The cold frame with a make-shift cover
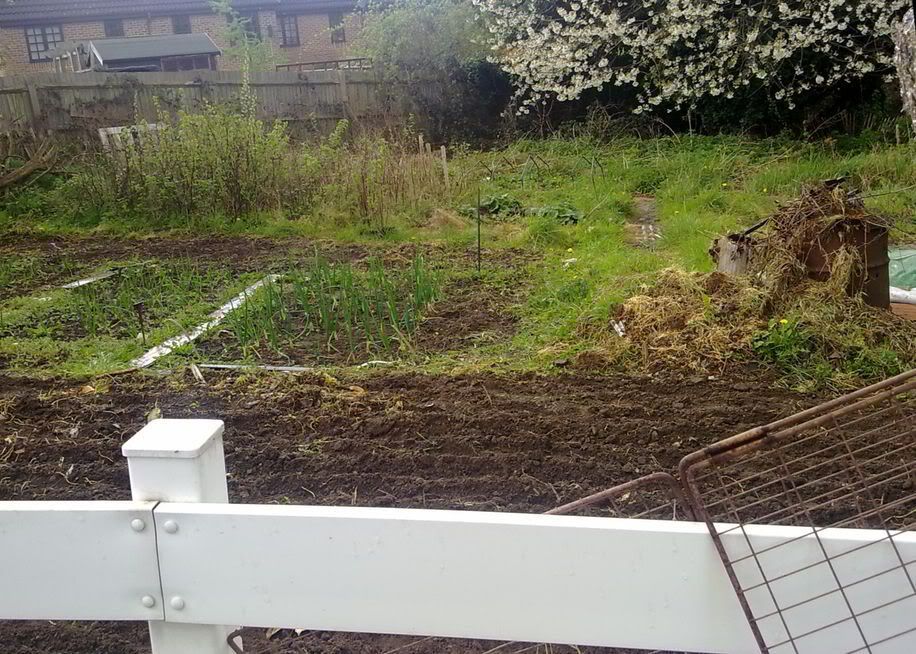
5 rows of potatoes and beyond that you can see the onion beds.
Cherry blossom on the right.
The fruit bed is beyond the onion beds.
The bent over green frames are the tops of the old plastic greenhouses,now used as supports for netting to keep the birds and foxes off the strawberries.
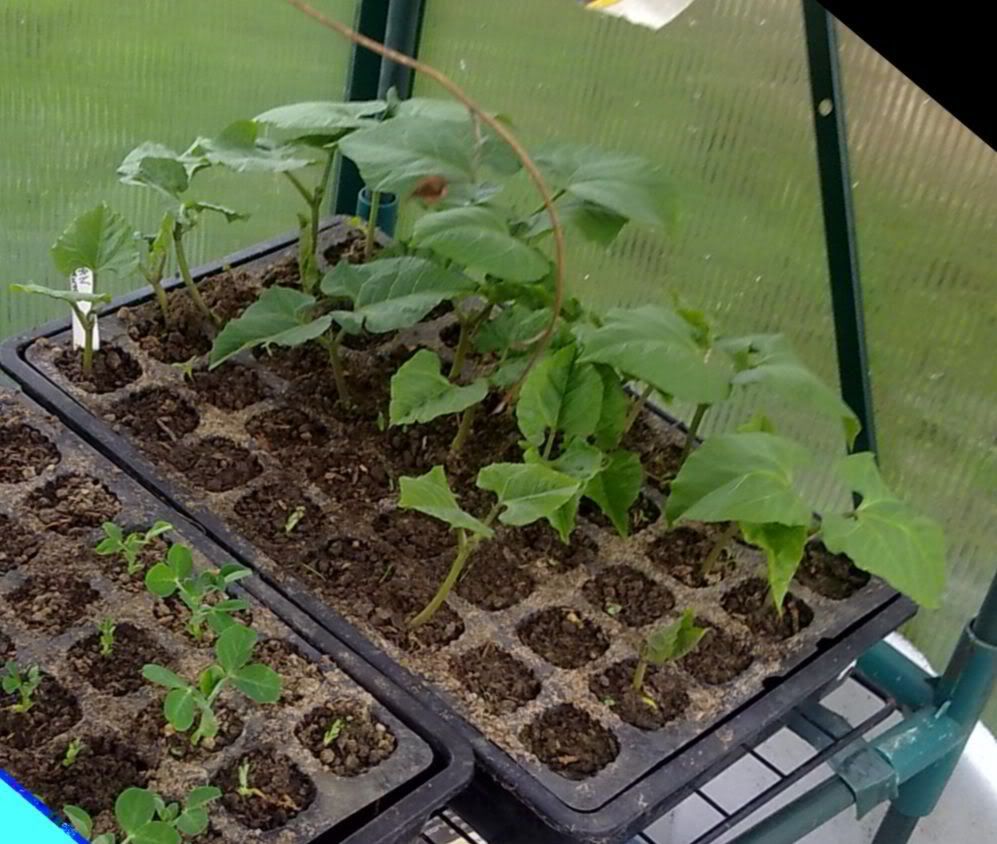
Runner Beans ,Scarlet Emperor (I potted these on yesterday)
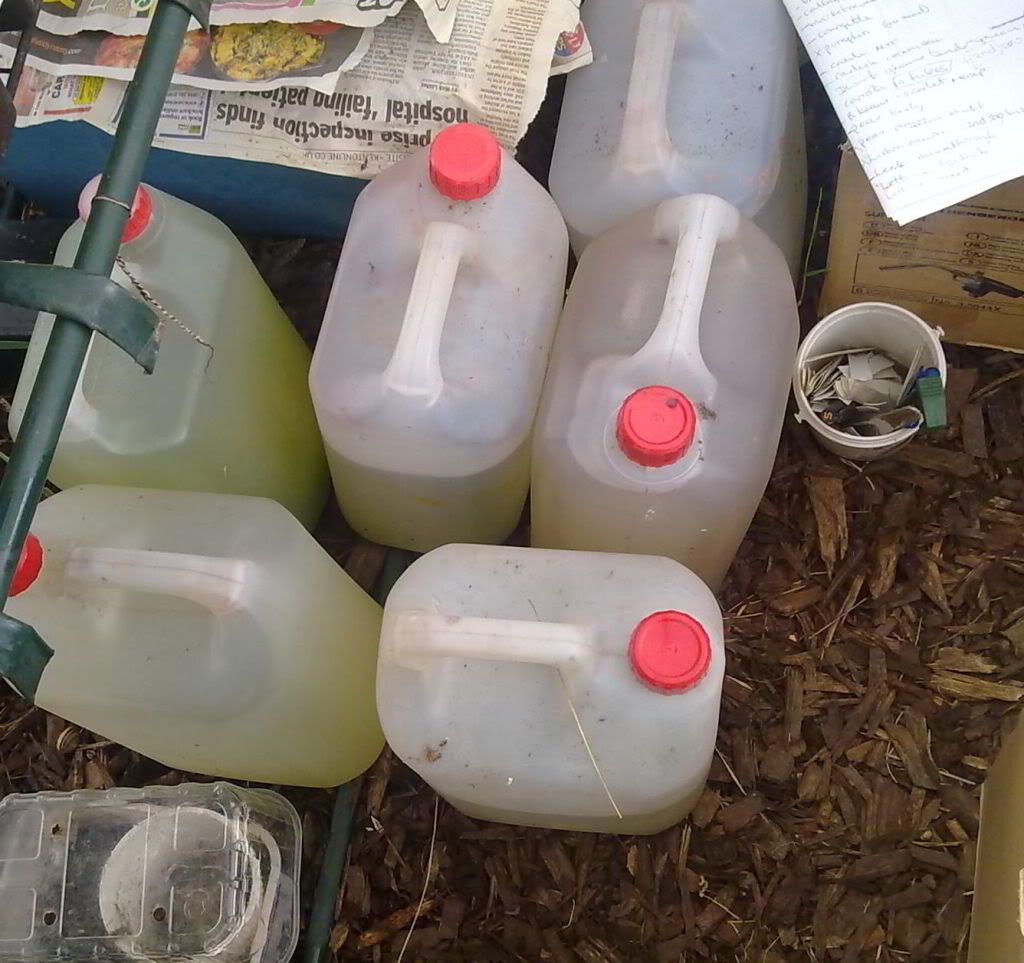
Rainwater in Gallon cans ready for watering.
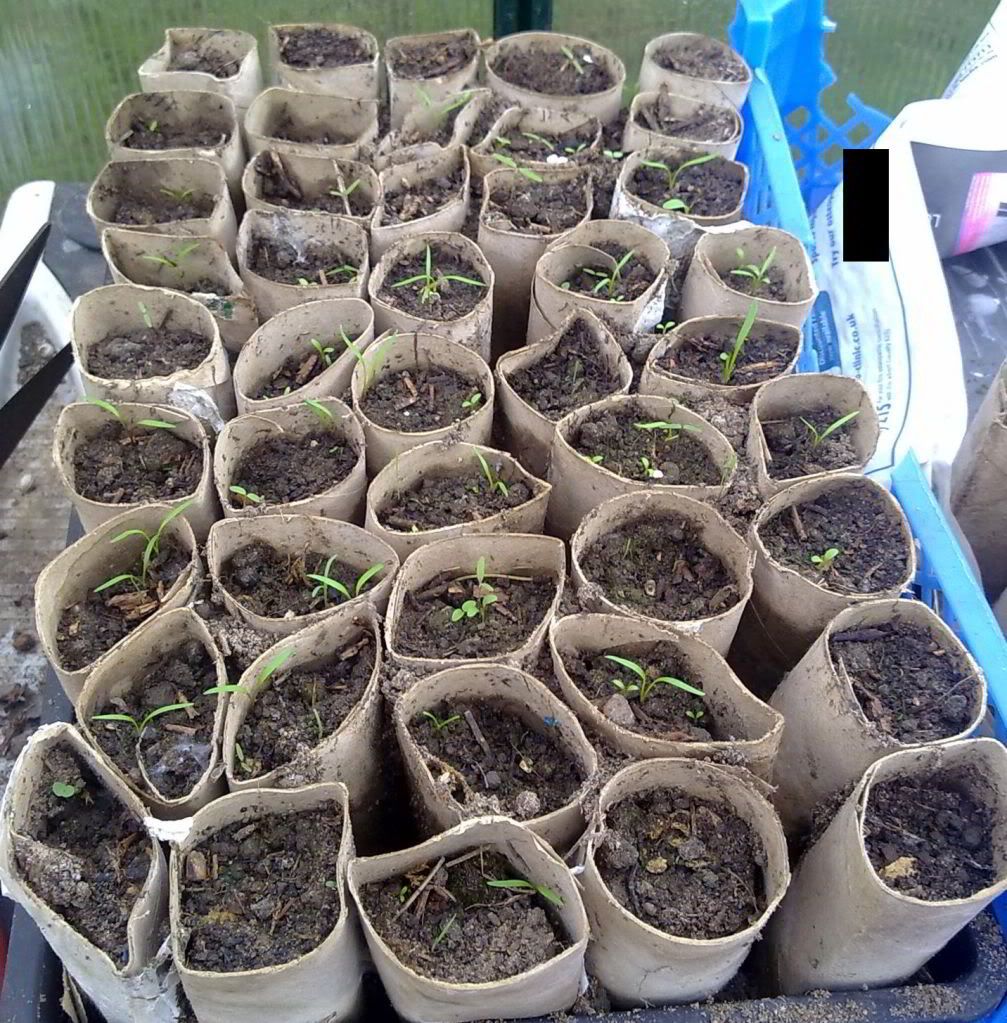
Carrots in loo roll tubes. I have a second lot started and will add to them every 2 or 3 weeks.

I didn't get a picture of the inside of the cold frame which is filled to bursting, as it was raining and I didn't want to get the camera any wetter.

Yesterday after lunch,the postie brought my new toy which is a plough tool for my wheel Hoe.
I found it on Ebay and managed rather jammily to get it for £12.50 delivered.
I have been using the hoe a bit more this year so I spent quite a long time a few days ago,making a bracket for it using the Dremel and some Aluminium from an old Apple Mac case,fashioning  an adaptor for Wolfe tools so they could be used on the hoe.

I managed to make one that would fit all the ends and so all that is needed is to slot the end in and do up a bolt. This works well with the cultivator end and the tiller with the oscilating hoe on and has made it much quicker working the soil. The flatter hoe is unfortunately not angled and so wont really be useful as a wheel hoe attachment .

The whole potato bed was cultivated in about 1 hour from bare earth and then ploughed to take the spuds in about 15 minutes.
Then it was a slower job to bend over and plant all the potatoes in the furroughs.
Last of all ,a swoosh along each furrough and the spuds were covered again.
It was raining by the time the spuds were laying in the earth and so they got a free watering to get them going.

I'll try to get some pictures up of the wheel hoe and its new tools once it is a dry day again. Today is overcast and it has rained and I haven't cleaned off the mud caked plough tool due to the rain becoming rather heavy and me being in it .